> ## Documentation Index
> Fetch the complete documentation index at: https://statsig-4b2ff144-mintlify-add-local-eval-country-note-96362.mintlify.site/llms.txt
> Use this file to discover all available pages before exploring further.
# Okta SCIM Setup
This guide outlines the process for setting up SCIM (System for Cross-domain Identity
Management) integration between Statsig and Okta. This integration allows for automated
user provisioning and management.
## Prerequisites
* An Okta account with admin access
* A SCIM Key from the [Statsig Console](/access-management/scim/overview#how-to-obtain-scim-auth-key) (requires Statsig Org Admin rights)
### Integration Notes
* User email management is not enabled on SCIM yet.
* When a user is removed from Statsig, they will be automatically unassigned in Okta. Conversely, if a user is unassigned or deactivated in Okta, they will be removed from the Statsig Organization.
* Creation of Statsig Projects and Roles is not supported via SCIM.
## Step 1: Create a New App Integration in Okta
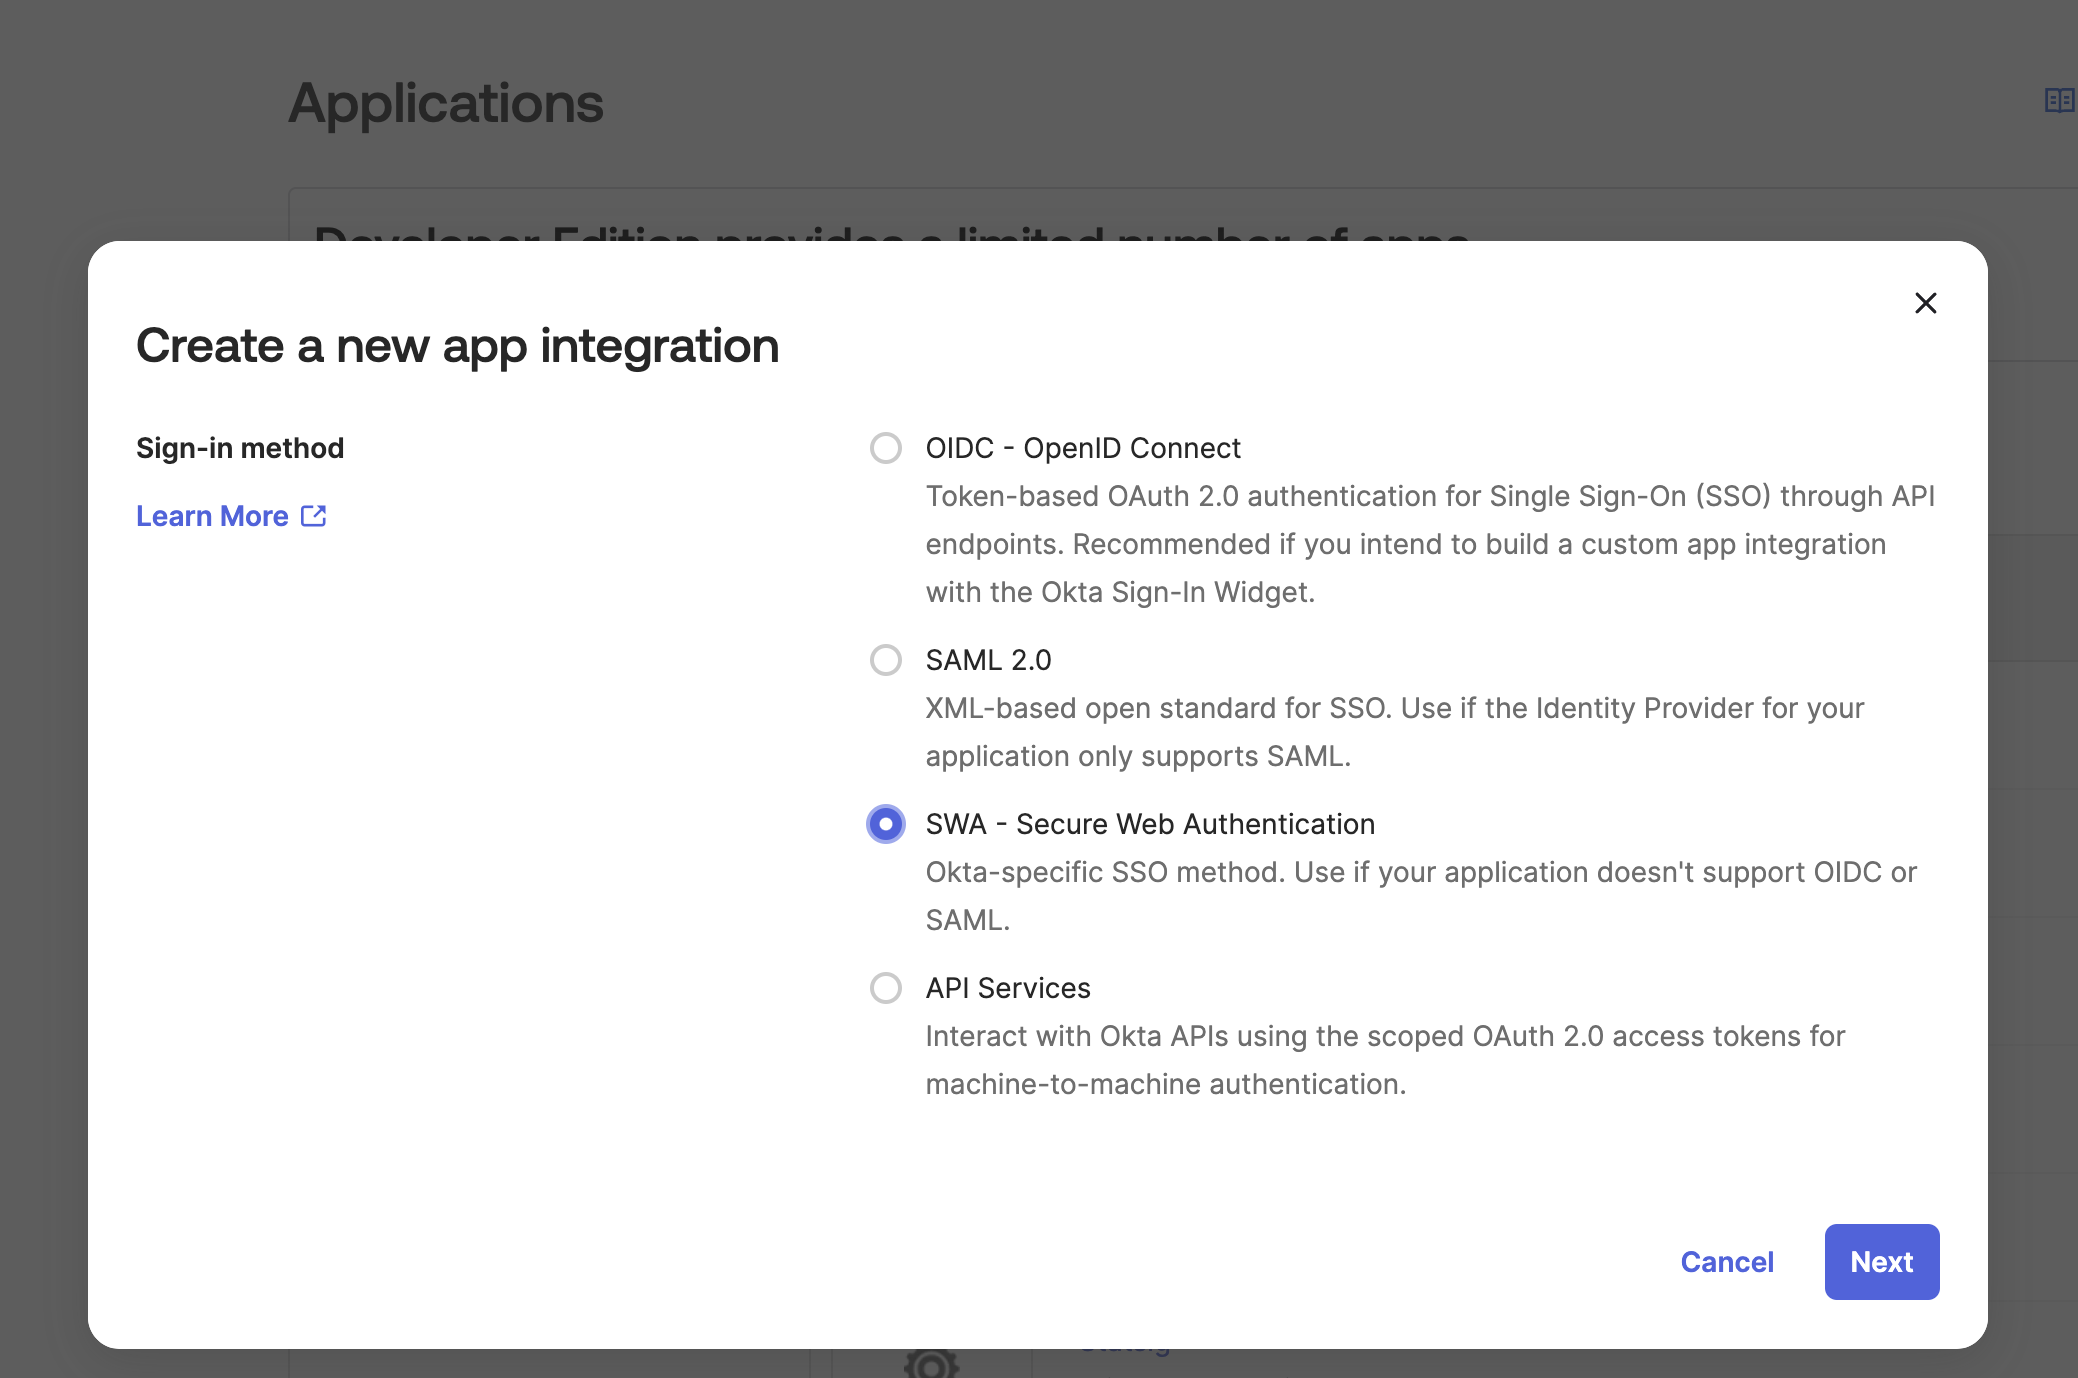
* Log in to your Okta admin console
* Navigate to Applications > Applications > Create App Integration
* Select "SWA - Secure Web Authentication"
 ## Step 2: Configure App Settings
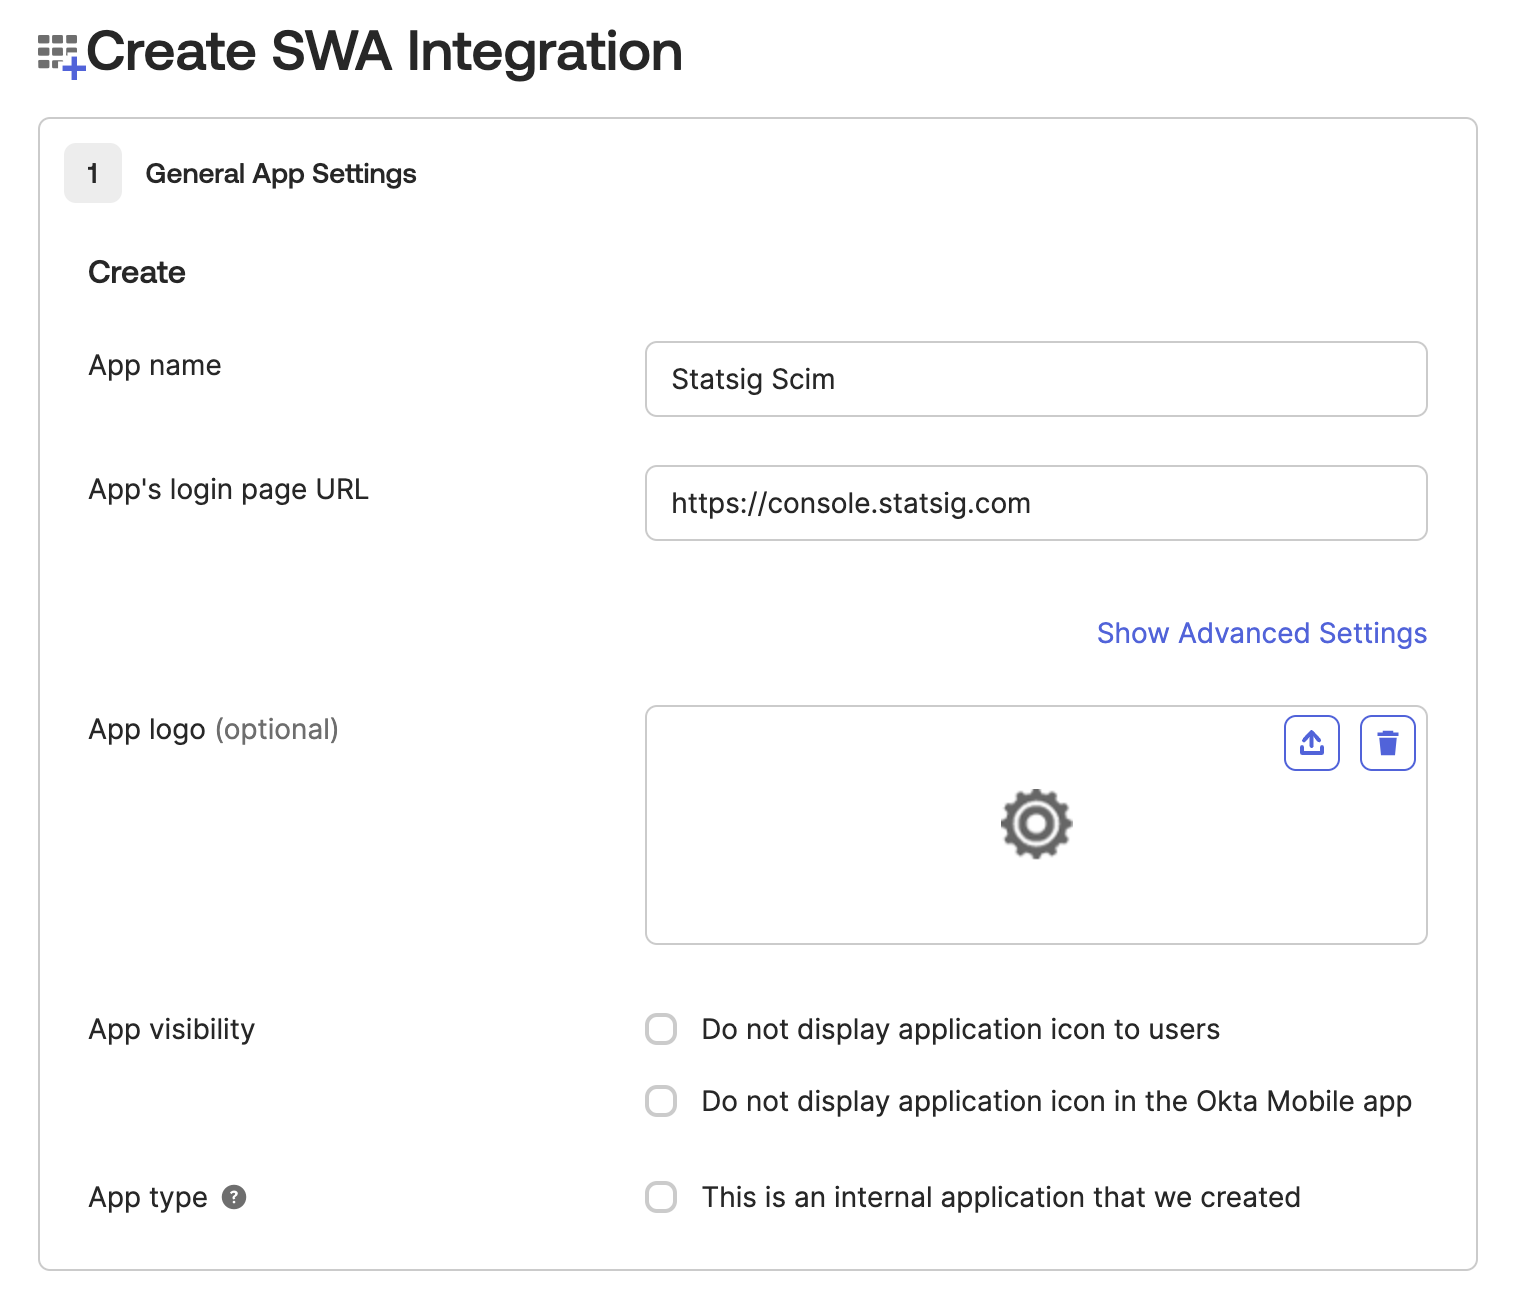
* Set the App name to "Statsig SCIM"
* Enter a placeholder URL for the App Login Page (this is a required field but not used for SCIM). Ex: `https://console.statsig.com/`
## Step 2: Configure App Settings
* Set the App name to "Statsig SCIM"
* Enter a placeholder URL for the App Login Page (this is a required field but not used for SCIM). Ex: `https://console.statsig.com/`
 ## Step 3: Enable SCIM Provisioning
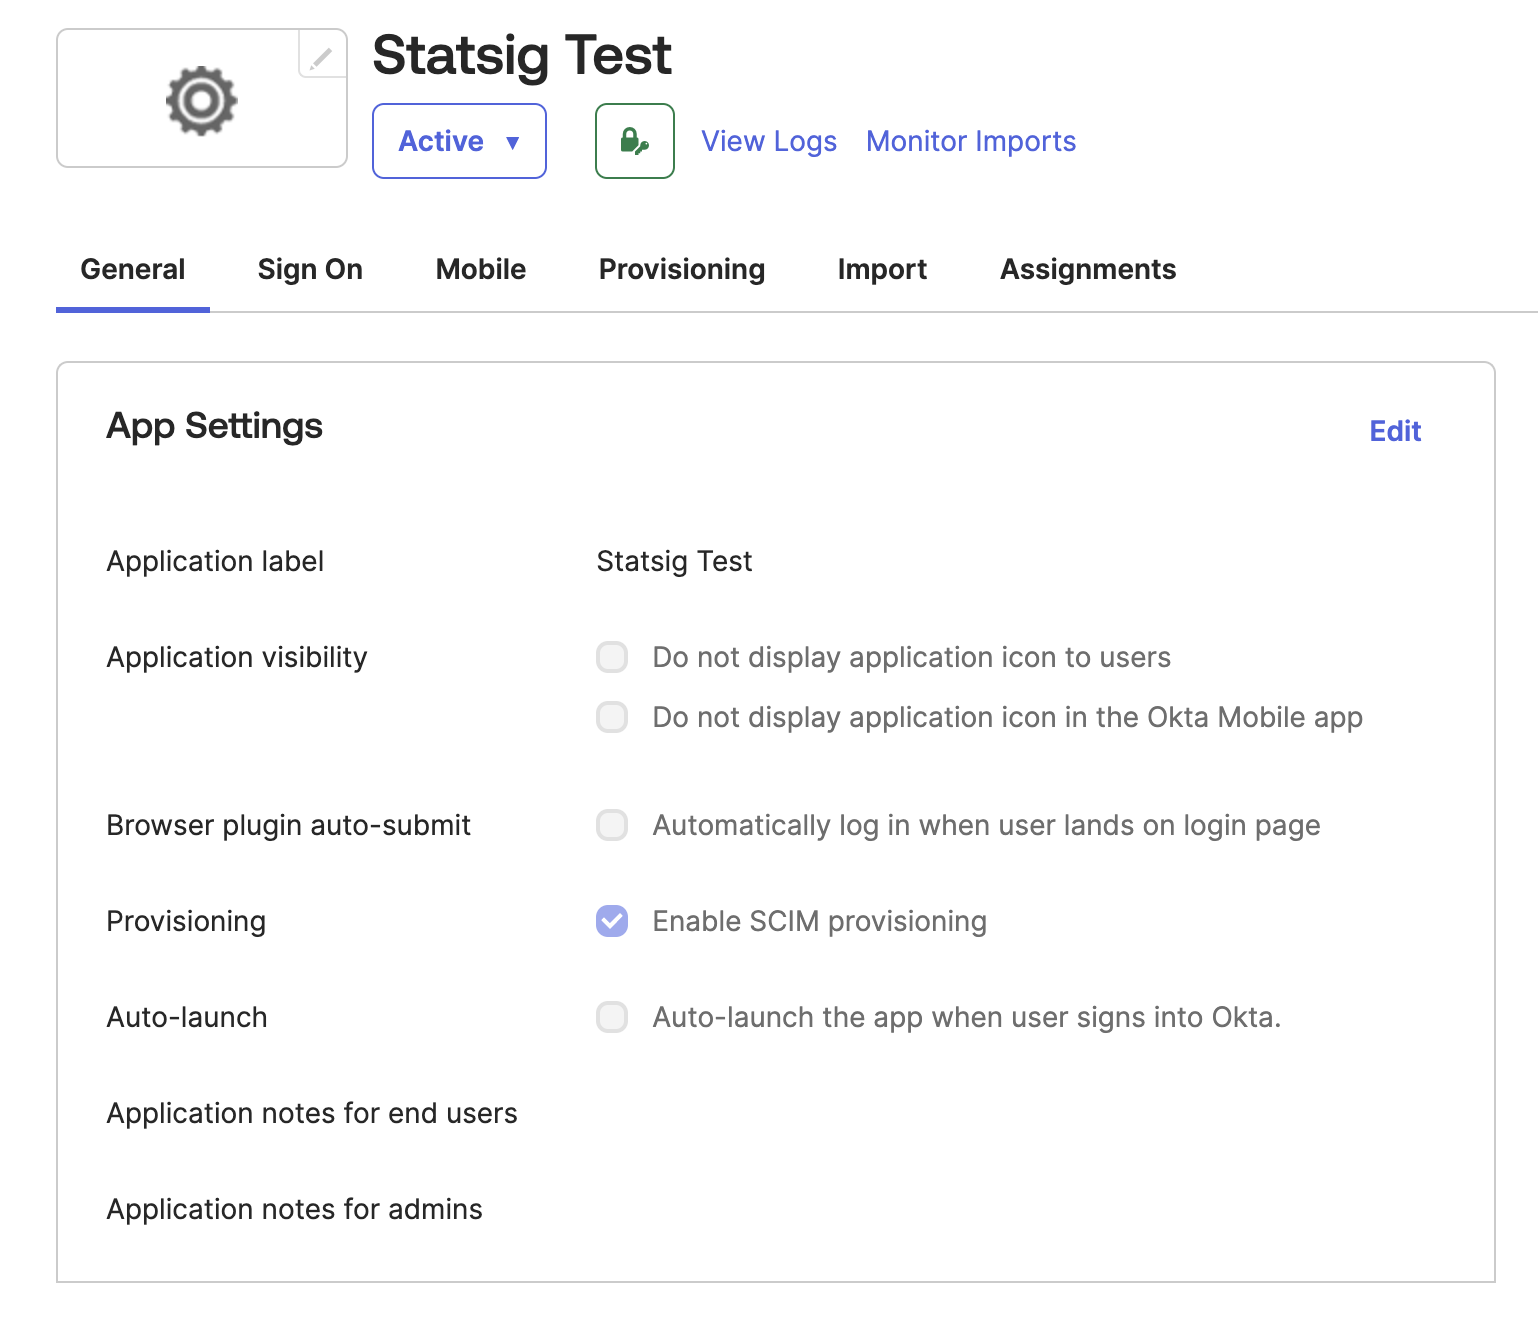
* After creating the integration, go to the "General" tab
* Click on "Edit" in the "Provisioning" section
* Enable "SCIM Provisioning"
## Step 3: Enable SCIM Provisioning
* After creating the integration, go to the "General" tab
* Click on "Edit" in the "Provisioning" section
* Enable "SCIM Provisioning"
 ## Step 4: Configure SCIM Settings
:::info
`Import Groups` requires an Okta flag `SELECTIVE_APP_IMPORT_PLATFORM`. If this flag is enabled for your organization, please select this option. If it is not, leave it unchecked.
:::
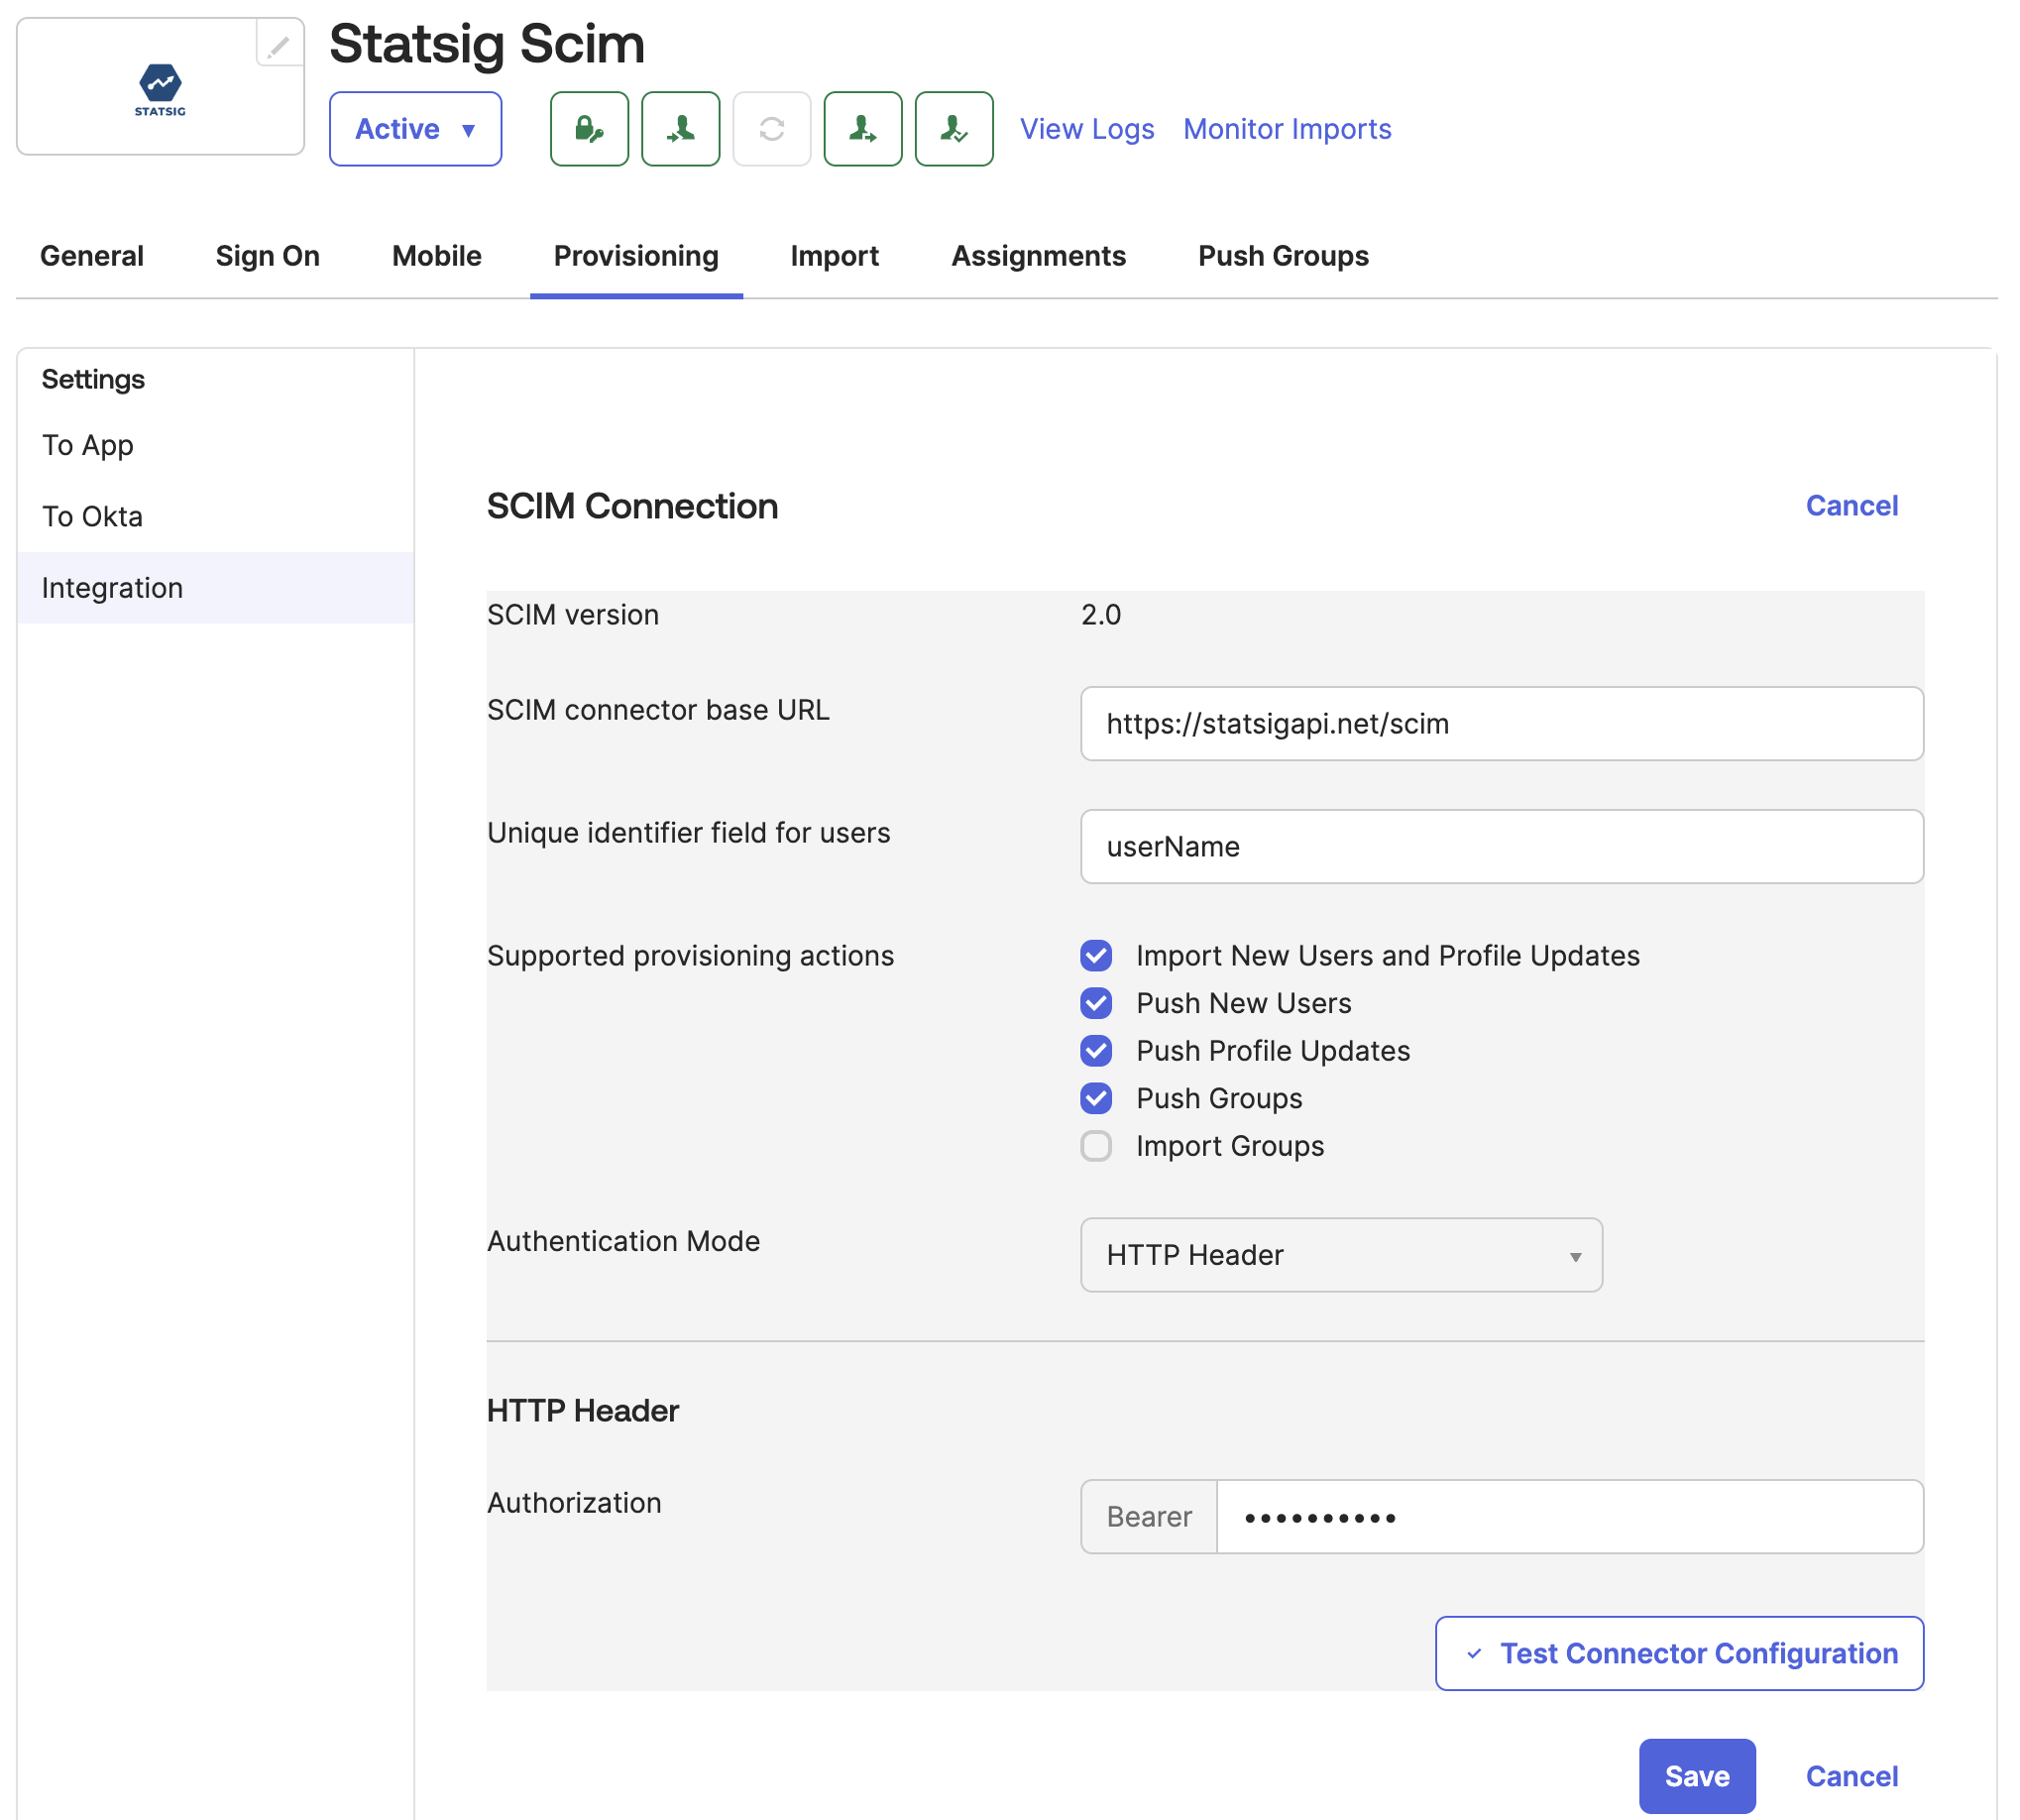
* Navigate to the `Provisioning` tab
* Set the SCIM connector base URL to: [https://statsigapi.net/scim](https://statsigapi.net/scim)
* Set "Unique identifier field for users" to `userName`
* Enable
* `Import New Users and Profile Update`
* `Push New Users`
* `Push Profile Updates`
* `Push Groups`
* `Import Groups` (Only if your organization has the `SELECTIVE_APP_IMPORT_PLATFORM` flag enabled, see note above)
* Set the authentication mode to "HTTP Header"
* For the authorization header, use the SCIM Bearer token generated in Statsig by your Org Admin. See [How to Obtain SCIM Auth Key](/access-management/scim/overview#how-to-obtain-scim-auth-key) for more details.
## Step 4: Configure SCIM Settings
:::info
`Import Groups` requires an Okta flag `SELECTIVE_APP_IMPORT_PLATFORM`. If this flag is enabled for your organization, please select this option. If it is not, leave it unchecked.
:::
* Navigate to the `Provisioning` tab
* Set the SCIM connector base URL to: [https://statsigapi.net/scim](https://statsigapi.net/scim)
* Set "Unique identifier field for users" to `userName`
* Enable
* `Import New Users and Profile Update`
* `Push New Users`
* `Push Profile Updates`
* `Push Groups`
* `Import Groups` (Only if your organization has the `SELECTIVE_APP_IMPORT_PLATFORM` flag enabled, see note above)
* Set the authentication mode to "HTTP Header"
* For the authorization header, use the SCIM Bearer token generated in Statsig by your Org Admin. See [How to Obtain SCIM Auth Key](/access-management/scim/overview#how-to-obtain-scim-auth-key) for more details.
 ## Step 5: Configure Okta to Statsig Settings
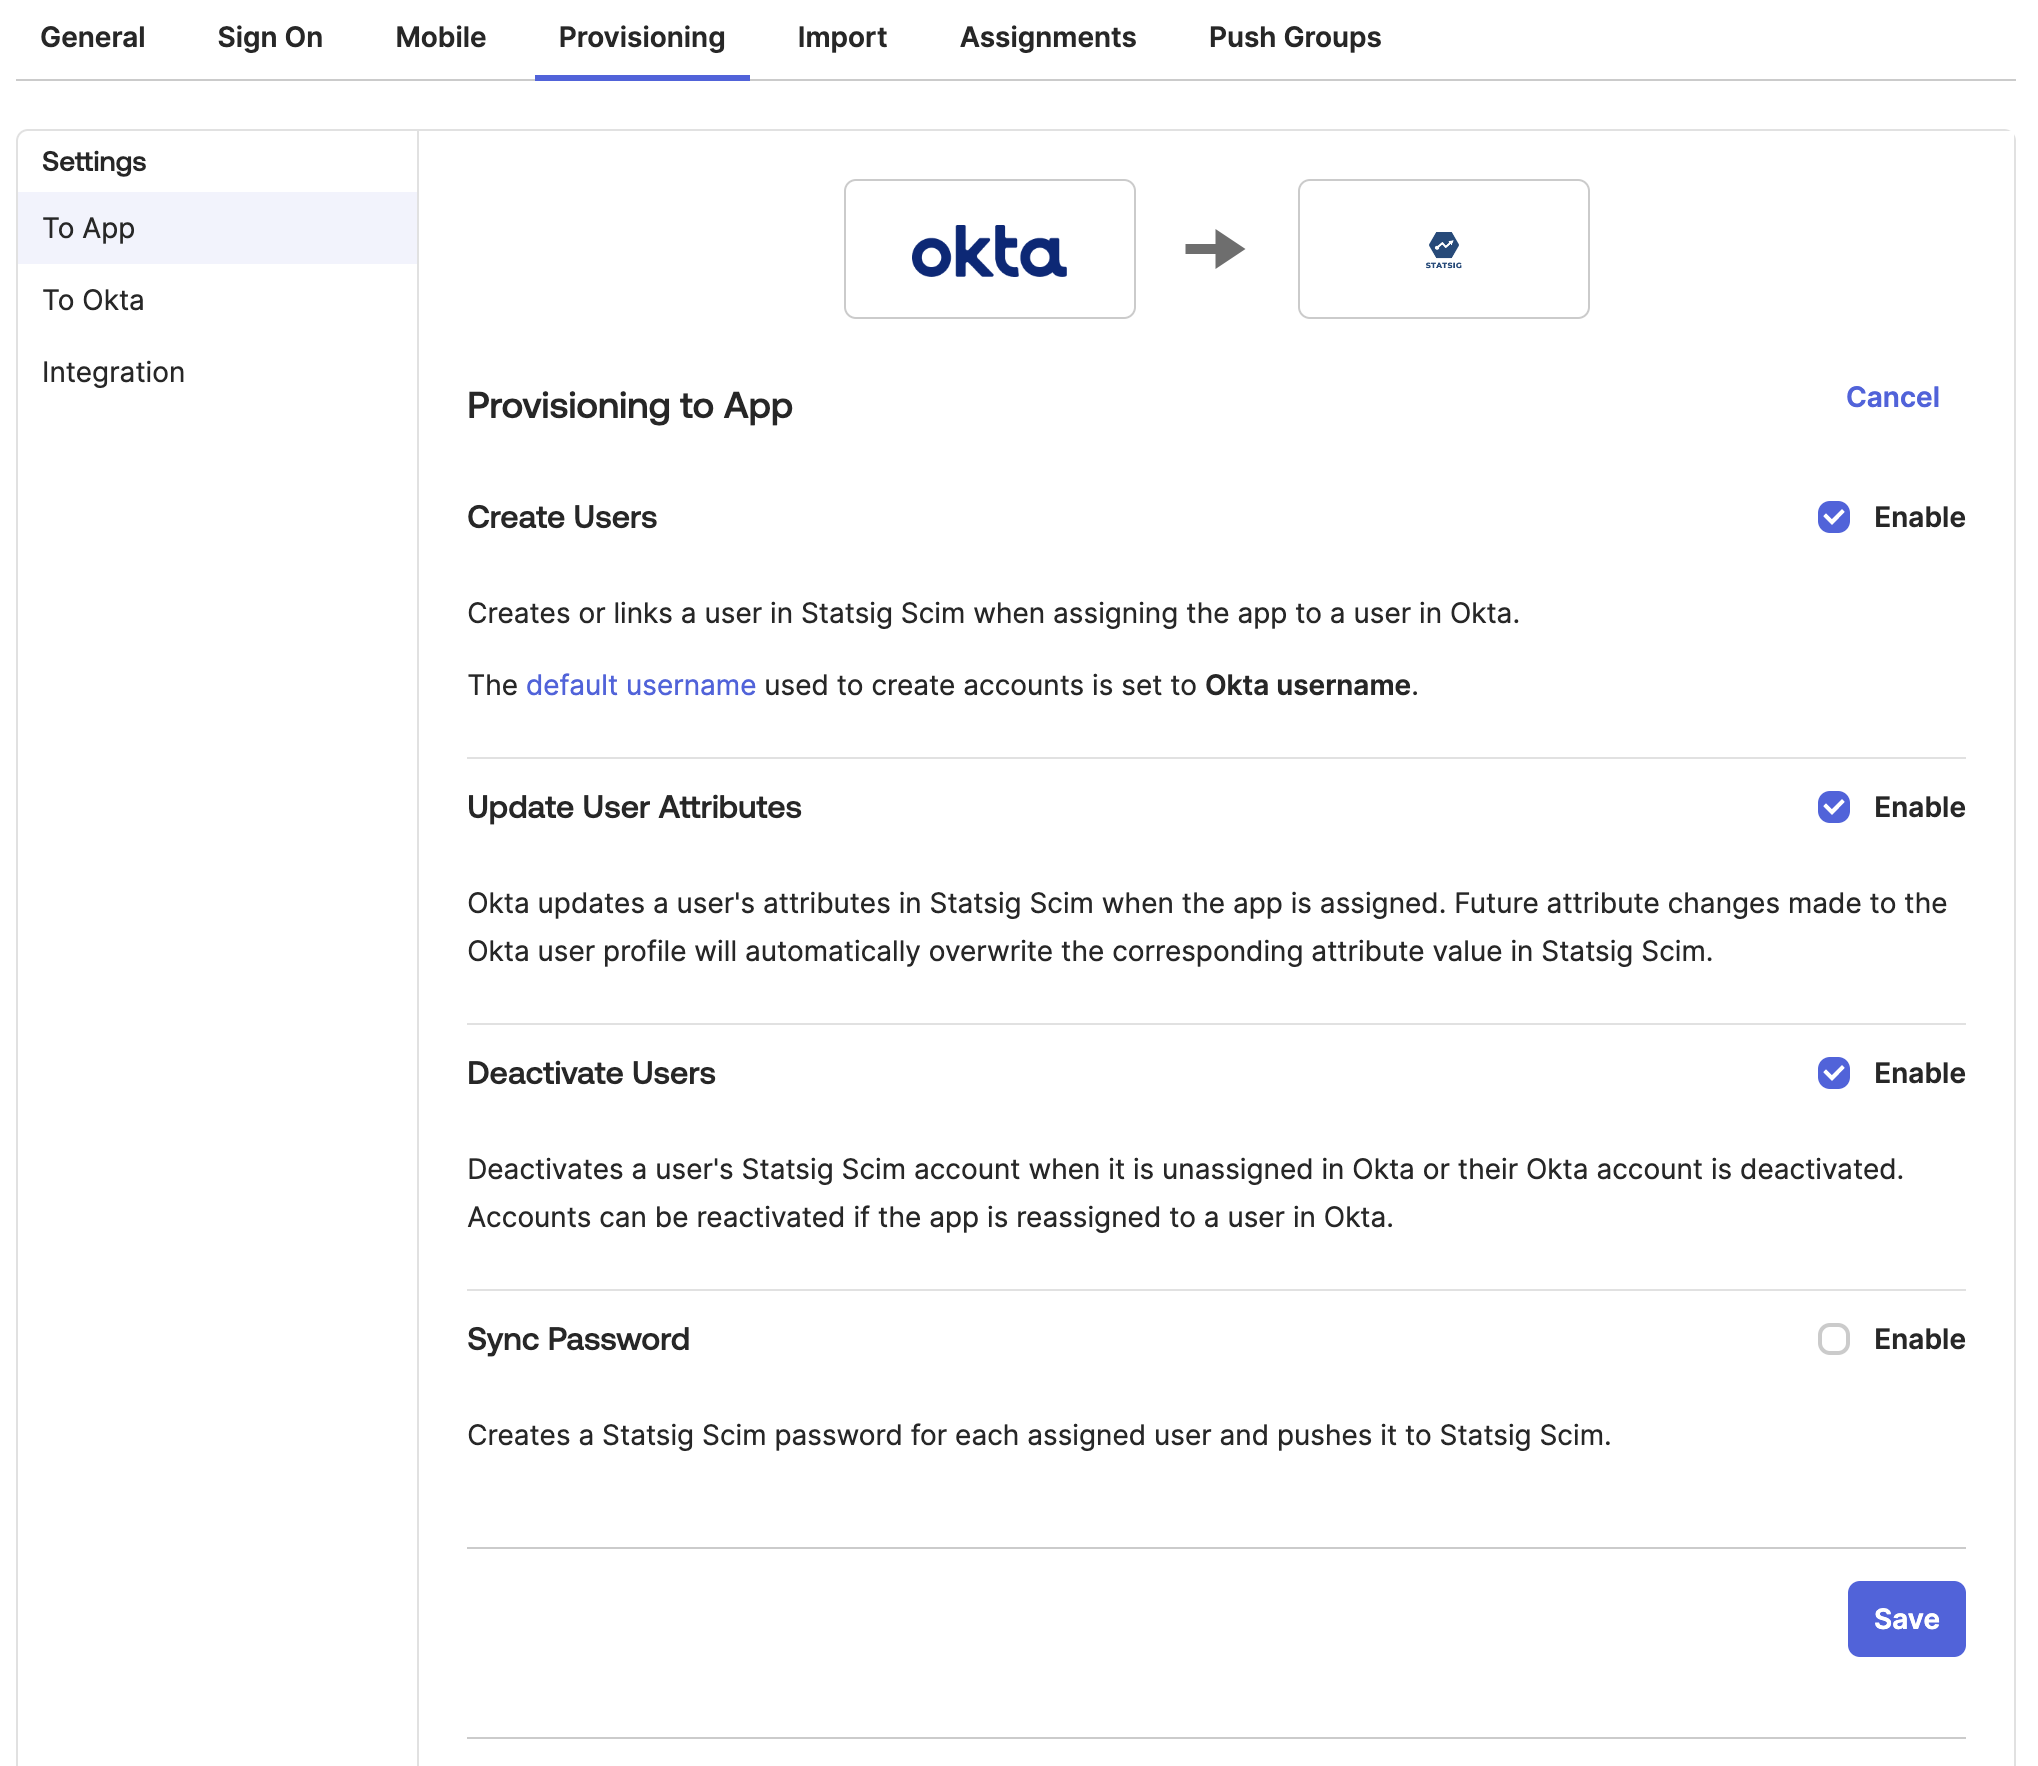
* Enable "Create Users"
* Enable "Update User Attributes"
* Enable "Deactivate Users"
## Step 5: Configure Okta to Statsig Settings
* Enable "Create Users"
* Enable "Update User Attributes"
* Enable "Deactivate Users"
 ## Step 6: Import Existing Statsig Users and Groups
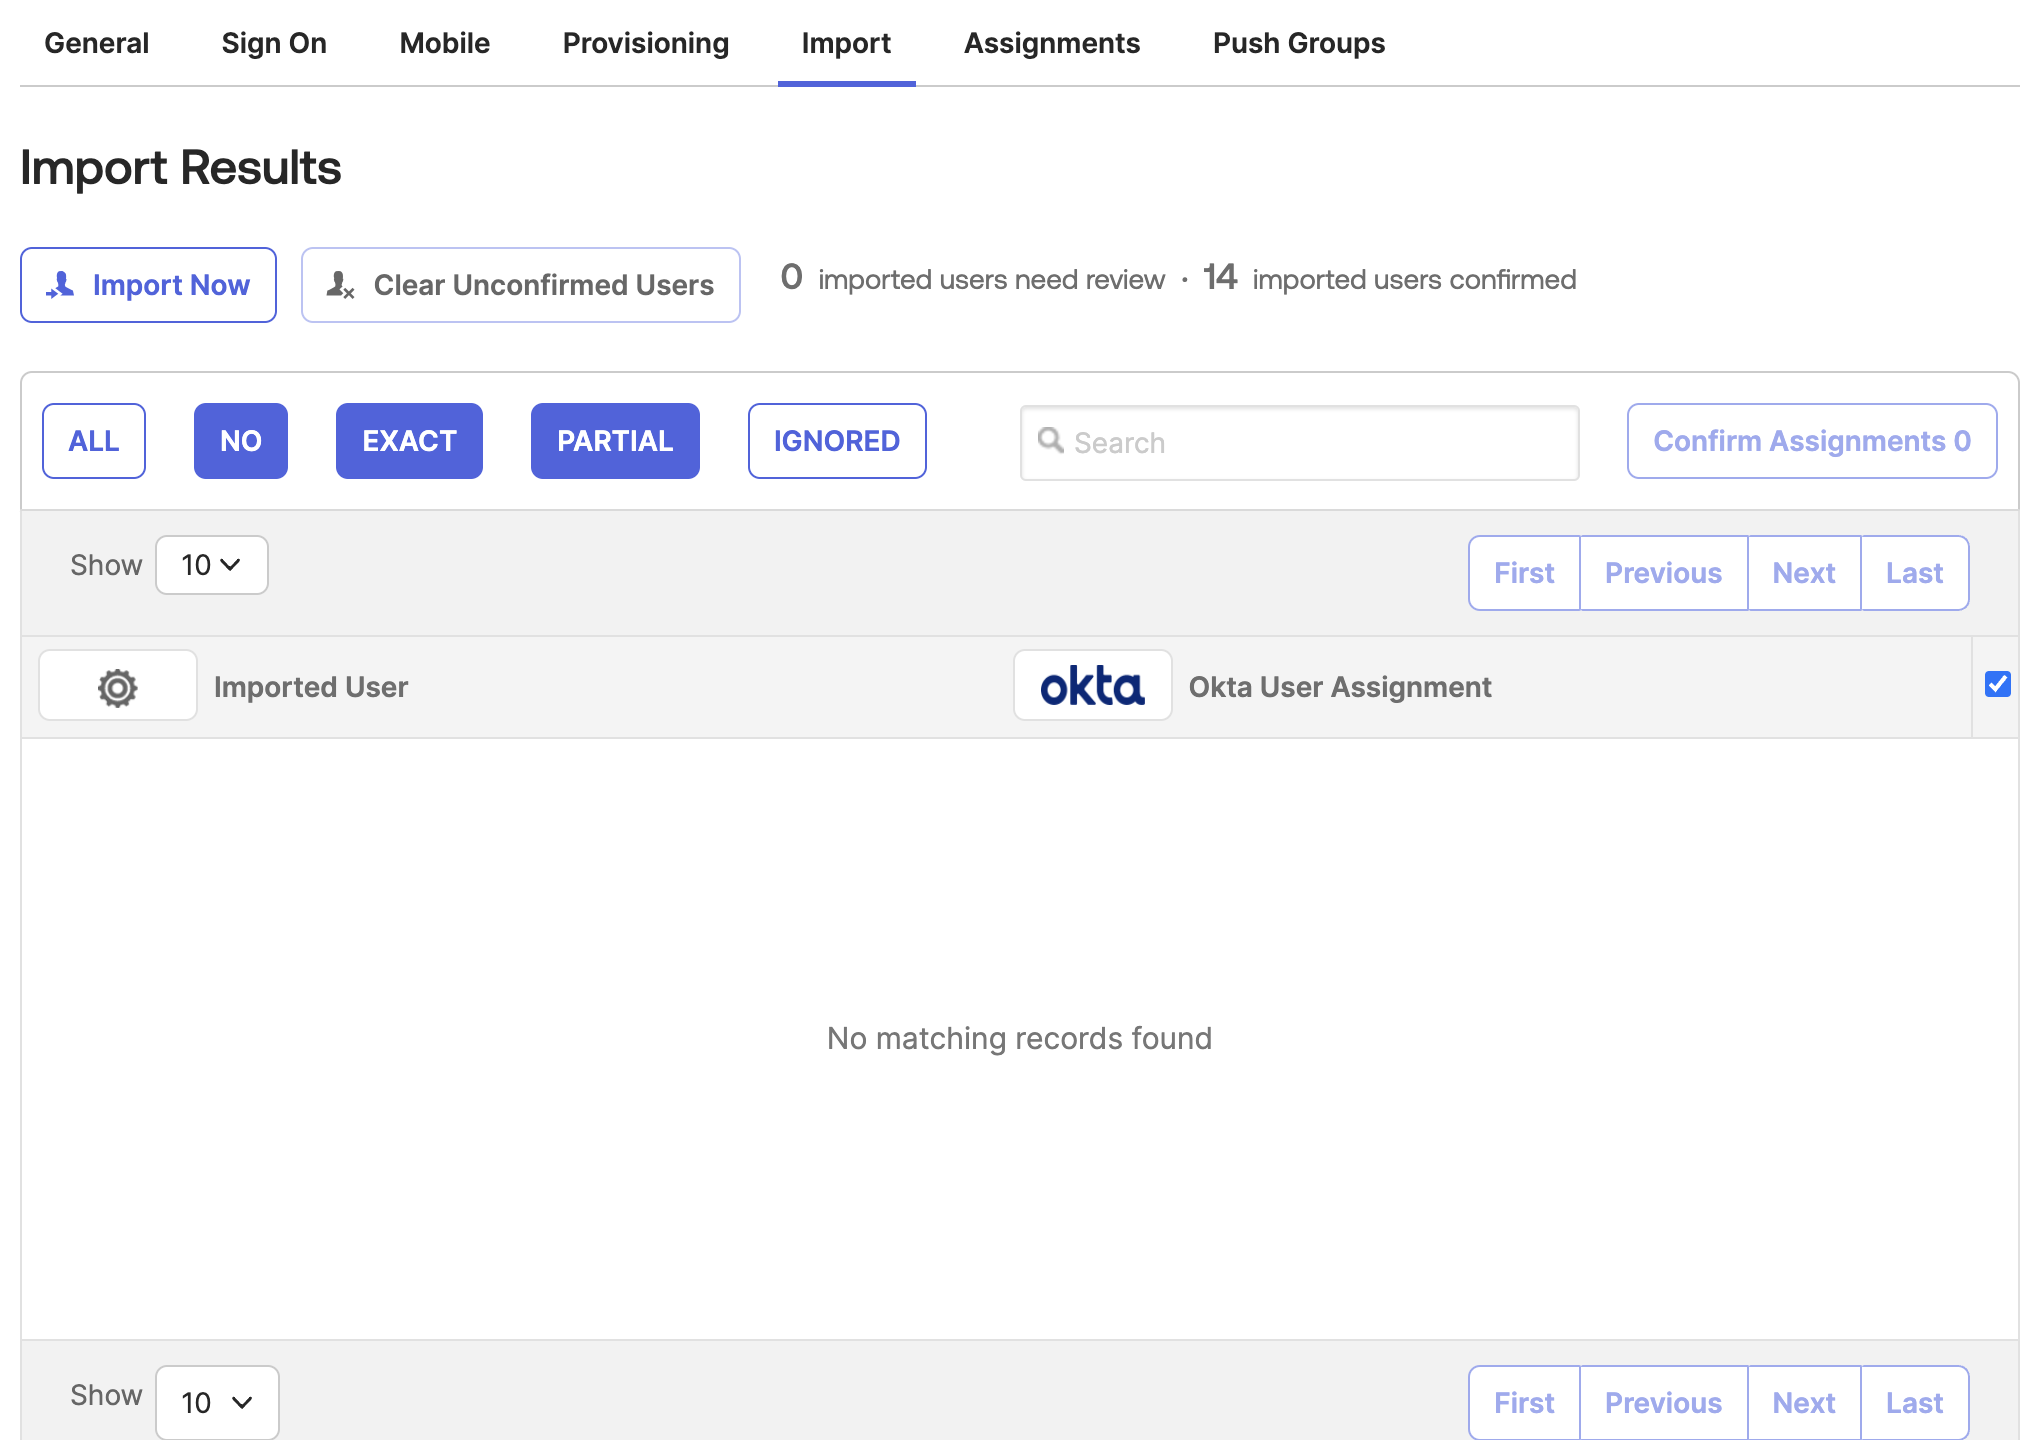
* In Okta, go to the Statsig app's "Import" tab
* Click "Import Now" to fetch existing Statsig users and groups
* Process the imported users as needed
## Step 6: Import Existing Statsig Users and Groups
* In Okta, go to the Statsig app's "Import" tab
* Click "Import Now" to fetch existing Statsig users and groups
* Process the imported users as needed